Scalp Micropigmentation (SMP) Treatment
Reviewing your treatment plan and completing forms
When in clinic for your first session for Scalp Micro Pigmentation the practitioner will reassess your treatment plan and discuss with you to confirm your details are correct.
We will also need to complete a medical questionnaire and any necessary consent forms, it is best to disclose all health information needed as we may need to adjust your treatment to have the best results.
Visual planning guides, marking out hair lines & before photos
After the paperwork has been completed, drawing out your planned treatment with visual planning guides really helps to build a mental guide for the client, in turn giving more confidence and calming expectations.
Taking the time to reconstruct your new hairline shape is very important, making any corrections and adjustments needed until you’re happy to proceed.
There are many options a client can take at this stage from creating natural soft edge outlines to more sharper hairlines, making age appropriate positioning, to even creating SMP scars within the treatment areas to help make the treatment look older than it is.
Having photos before and after your treatment is a great way to remind you of how far you have come when you complete your treatment, it also helps the practitioner to assess the pigment and how it is settling at each session. In some cases and with a client’s consent we may ask to use the images to help others see the processes and outcomes.
Cutting hair if required

Scalp Micropigmentation works very well for clients looking to add density back into thinning hair areas, it also supports clients looking to reduce visibility from scaring and with client’s that have had to shave their heads due to male pattern baldness, working with your practitioner on hair length is very important in getting the best results short and long term.
Your practitioner on the day can cut the hair to the required length if needed.
Now that your hairline shape is agreed, your hair is cut if required, you’re ready to go. The practitioner will choose the correct pigment tones using distilled water with pure pigment to create the first layer of information needed on the scalp. You may see two or three different tones being used or even a patch test to check how the skin reacts and to assess tone pigment against your skin.
Why do you need more than one session?
Scalp micro pigmentation works at its best when you build up multiple layers of tone information, each layer is created in one session.
How many sessions you need, would depend on the degree of hair loss the client has.
After each completed session, your practitioner will run through your aftercare plan, which will clearly guide you over a 7 day period for best results and getting ready for your next session.
Sessions 1-2 are spaced 7 days apart for the purpose of healing and exfoliation with session 3 normally 7-10 after your second session.
First Session
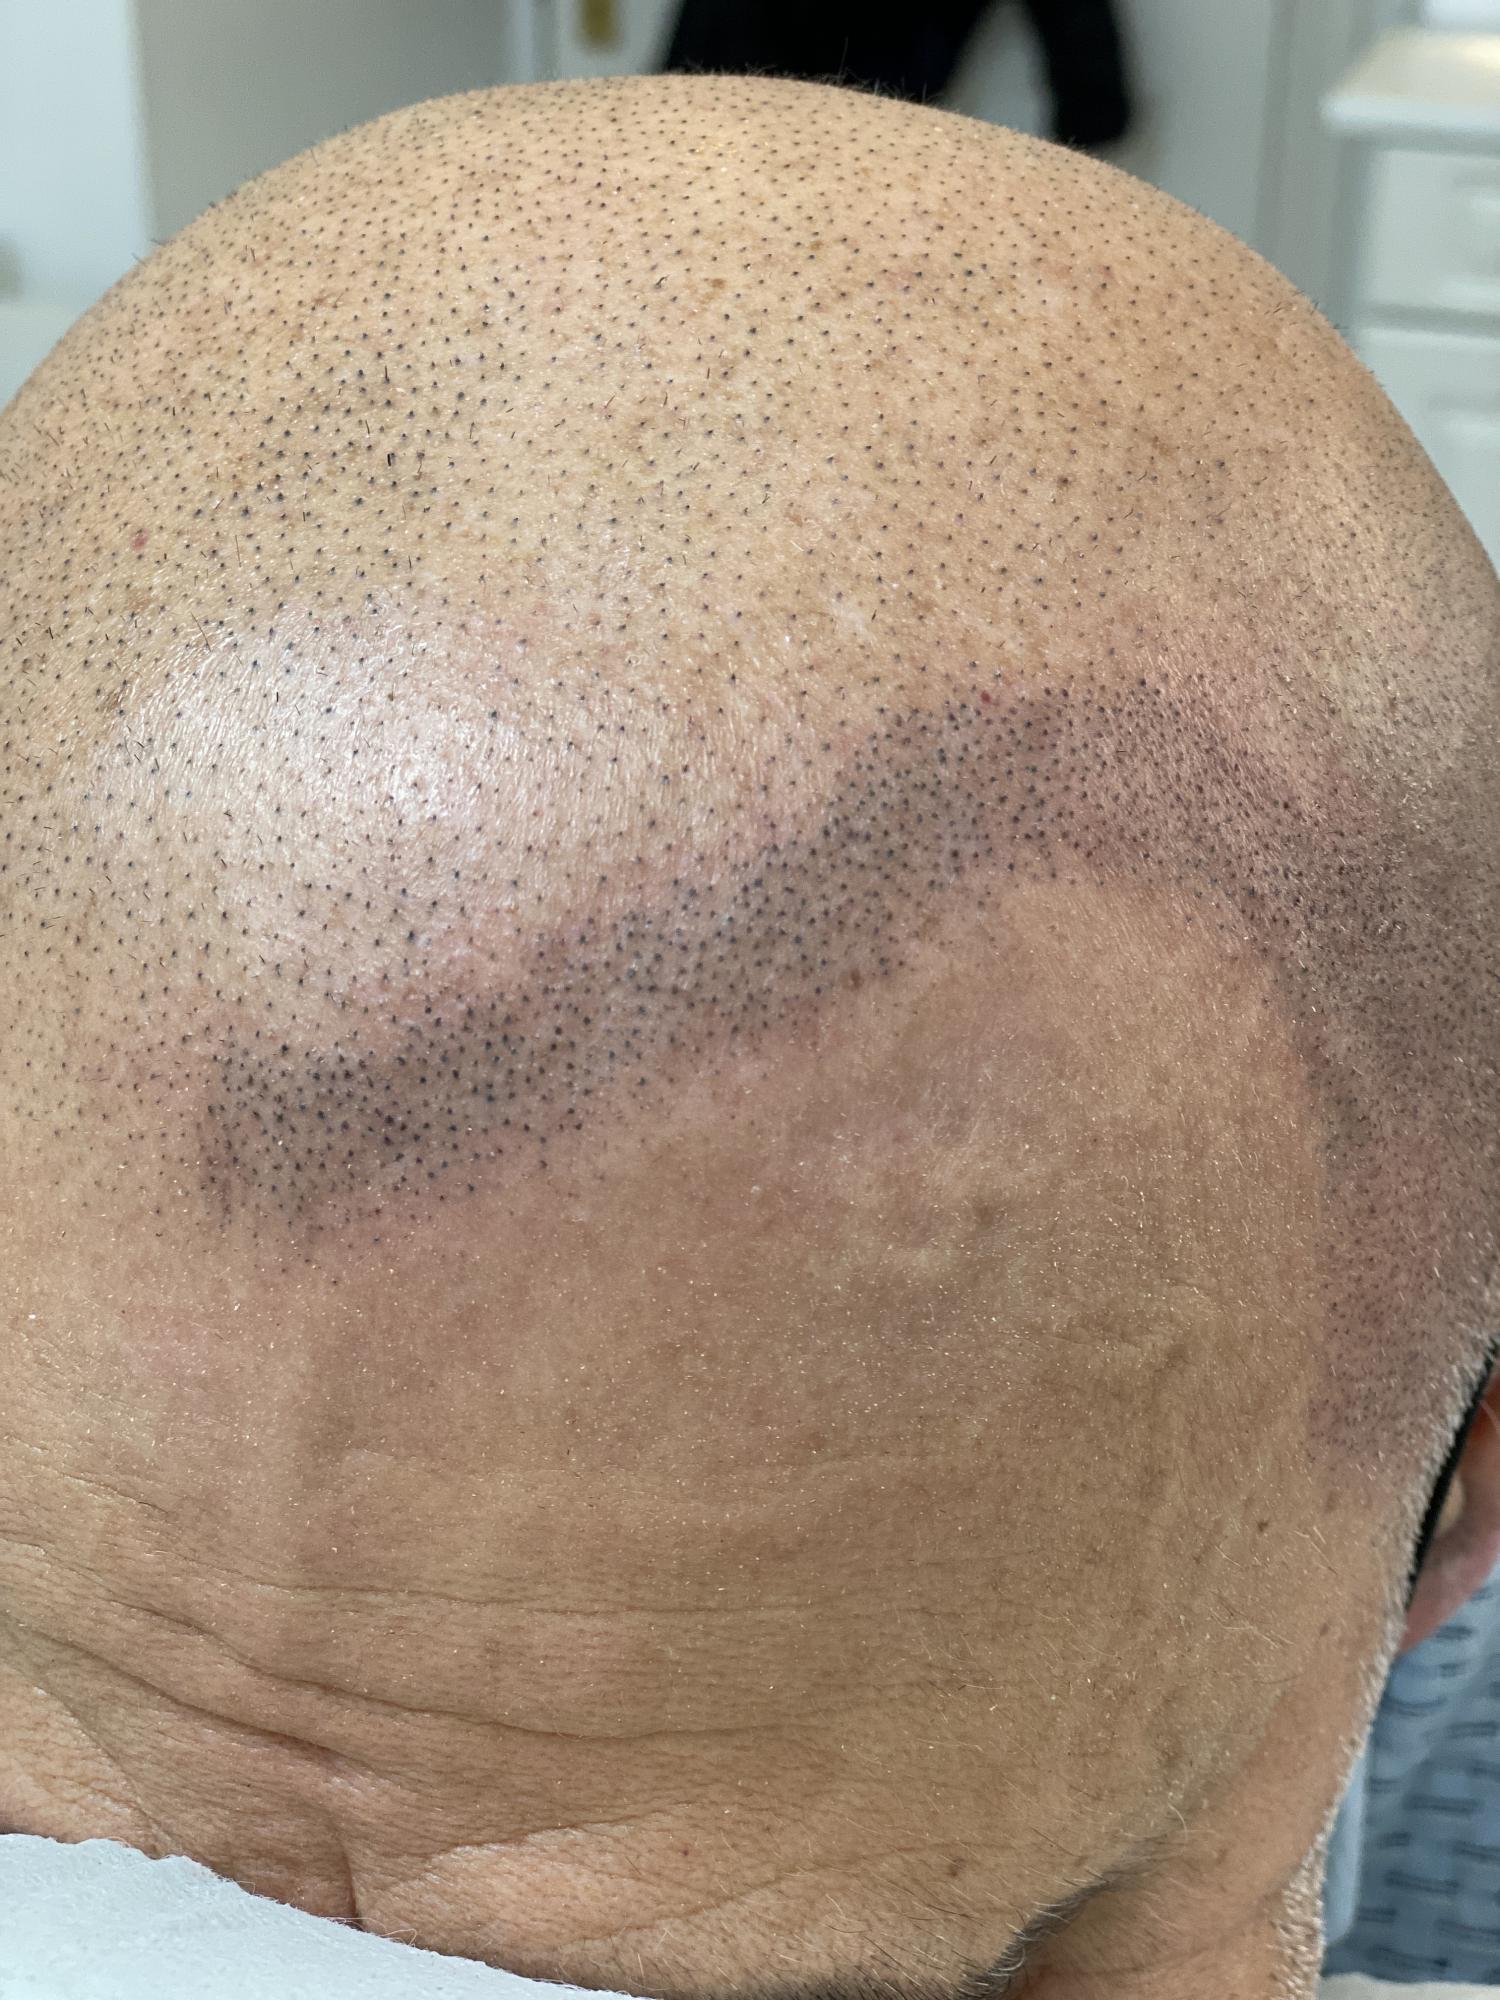
The pigment used would be a foundation layer with open pigmentation placements, working within your plan treatment shape. This will look like the dots are overly spaced apart but it’s all part of building up the information.
You will have some redness on the scalp from the pigmentation process but this will fade after 1-2 days. You will also notice the treatment looking dark after each session, but this is just micro pockets of blood that form into micro scabs which exfoliate off after 4-5 days leaving the true pigment tone.
Second Session
This session is usually a little longer than the first session but principally is the same process as your first.
Going in between the gaps from the first session bridging the imbalances bringing the tones even closer together.
The practitioner will change the darkness of tones used in this session and will work in between the gaps from the first session.
The scalp artist will also assess how the pigment is holding within the skin, make any adjustments if needed, managing any patching or drop out’s which can occur in some cases.
Third Session
Your practitioner will again assess how the pigment is holding within the skin making any adjustments needed before starting session 3.
Also known sometimes as a detail session, with time frames similar to your second session, this for some can be the final session needed, bringing all the pigment layers together to complete a perfect finish. At this point we will discuss ongoing aftercare guides on how to protect your treatment.
Being located in Bristol we cover many key locations like Yeovil, Cornwall, Exeter, Cardiff, Bath, Birmingham, London.